Macros are optional for ease of maintenance.
As others,
■ Preventing erroneous constraints
■ Usage Notes from the constraint designer to the users
Additional functions are available.
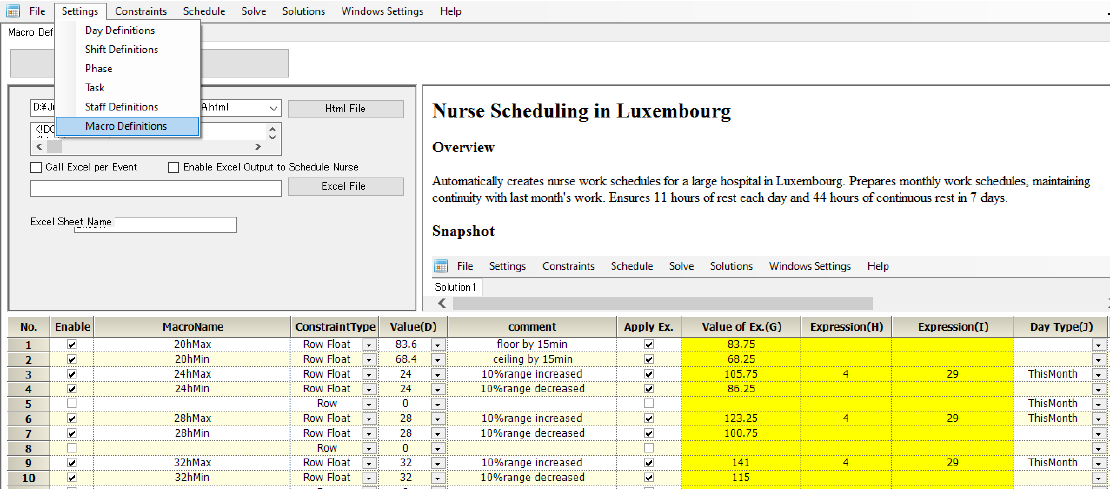
Macro functions
Replacing values
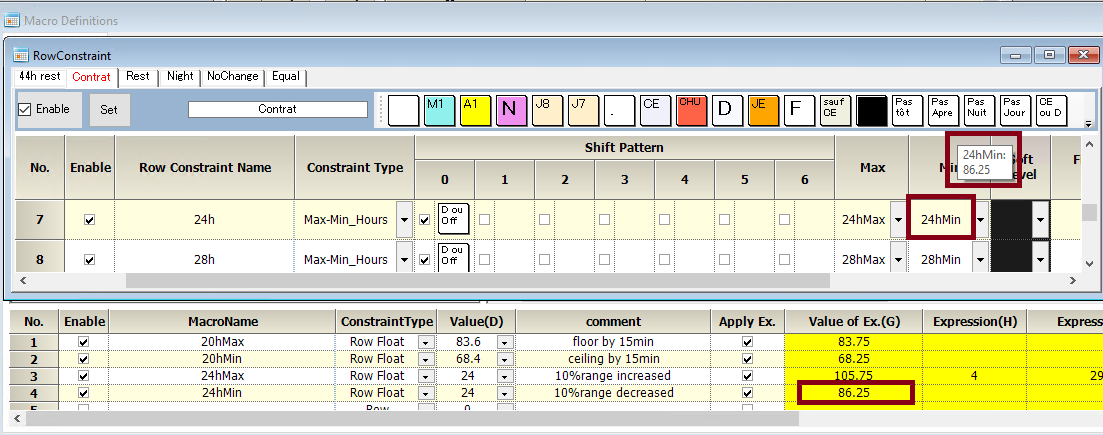
Below is an example of using a macro to replace the maximum and minimum values of a column constraint.

The values are replaced with user-defined values (D).

Replacing expression values

Replaced by a user-defined expression value (G).
If “Apply Ex.” is checked, the expression value (G) is adopted.
If unchecked, the value (D) is adopted.

Spreadsheet function
The yellow part is the spreadsheet calculation function part.
It is an Excel-like notation, but it is not Excel-compatible but unique. For details, please refer to the following API.
Formula Support in Windows Forms Grid Control | Syncfusion
Functions originally implemented in Schedule Nurse
C(Day set address) and C(Group set address) are originally implemented functions.
C refers to Count and counts the elements of the concerned set.
Count the number of days in “ThisMonth”.

Count the number of staff in ALL_STAFF*number of Night Staff per day.

We rounded down the number of night shifts per person, which became the minimum number.

Floating numbers
Use dedicated constraint types (Row Float and Column Float) to replace floating numbers.
Note that all other constraint types assume integers and cannot handle floating decimals.
(For example, if you use the row constraint type where you expect a value output of 86.25, the calculation result will be output as 0.)
At the constraint destination, confirm the value by pressing the middle mouse button.

Internal Assert Constraint Type
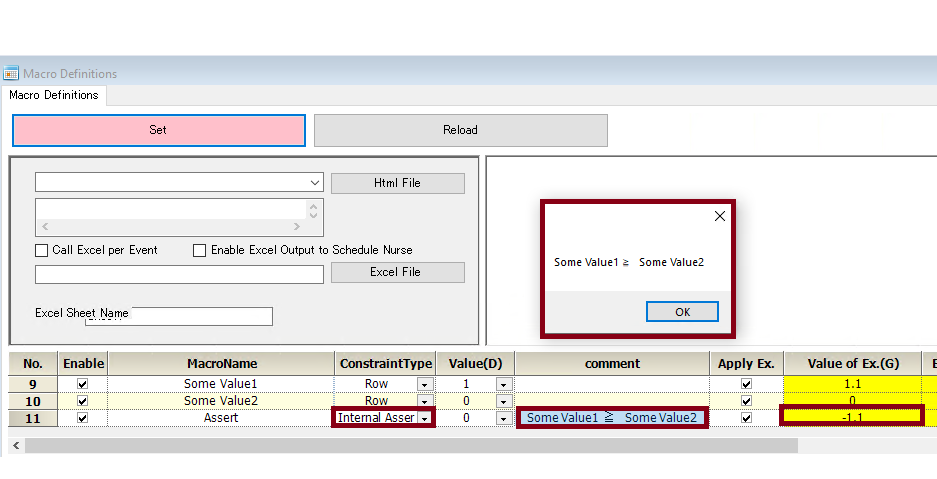
Assert works similar to assert in a programming language. It is a mechanism to check the original operation.
The assert condition is >= 0.
However, the configurator has mistakenly set the values, resulting in minus value and causing an assertion error.
As a result, it cannot be set. In case of an error, the assertion error dialog is designed to generate the comment as it is.

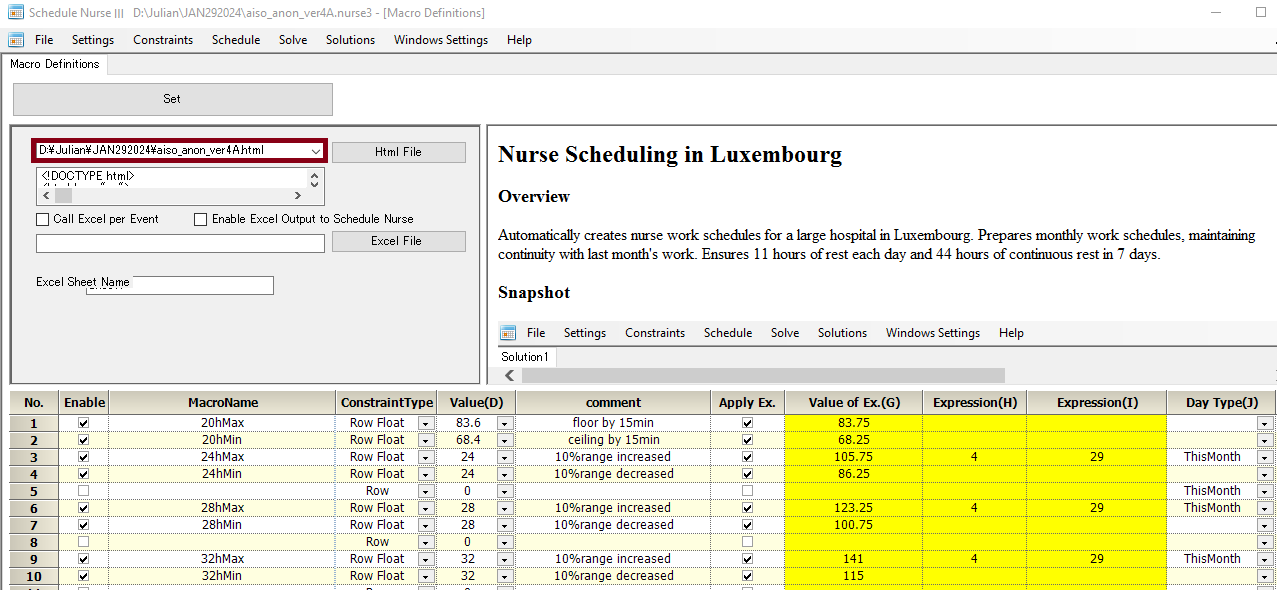
Usage Notes html
If an usage notes html file has already been created, use “Html file” to specify the file.
Paste the contents of the html file in the Text box, clear all the html file paths (orange part), and press the Set button and save the file.
Then, the next time you load the file, a project name.html file will be generated in the same folder as the project file.
The path will be entered in the html file path.


It is convenient to generate the html file in markdown language and embed images in Base64, so that only one project file is needed.

